Summary:
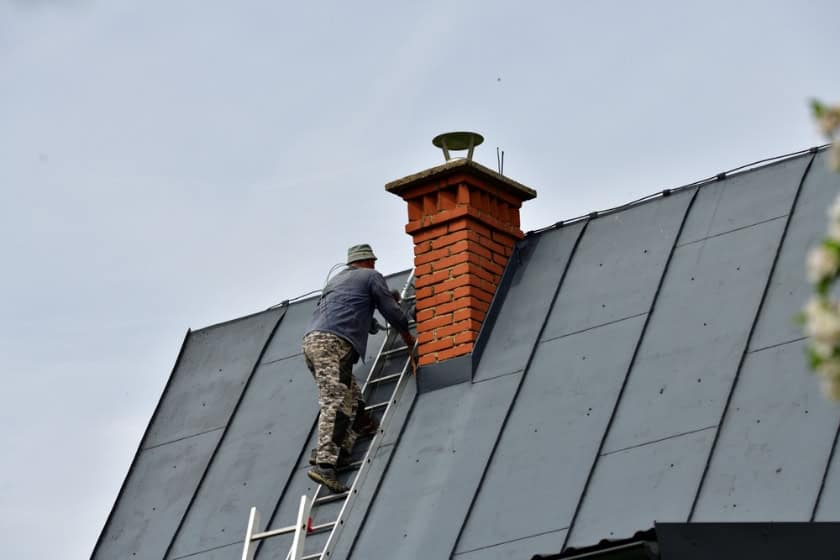
Every proper chimney repair service starts with a thorough inspection, not a quick glance from the ground. We need to understand exactly what’s wrong before we can fix it right.
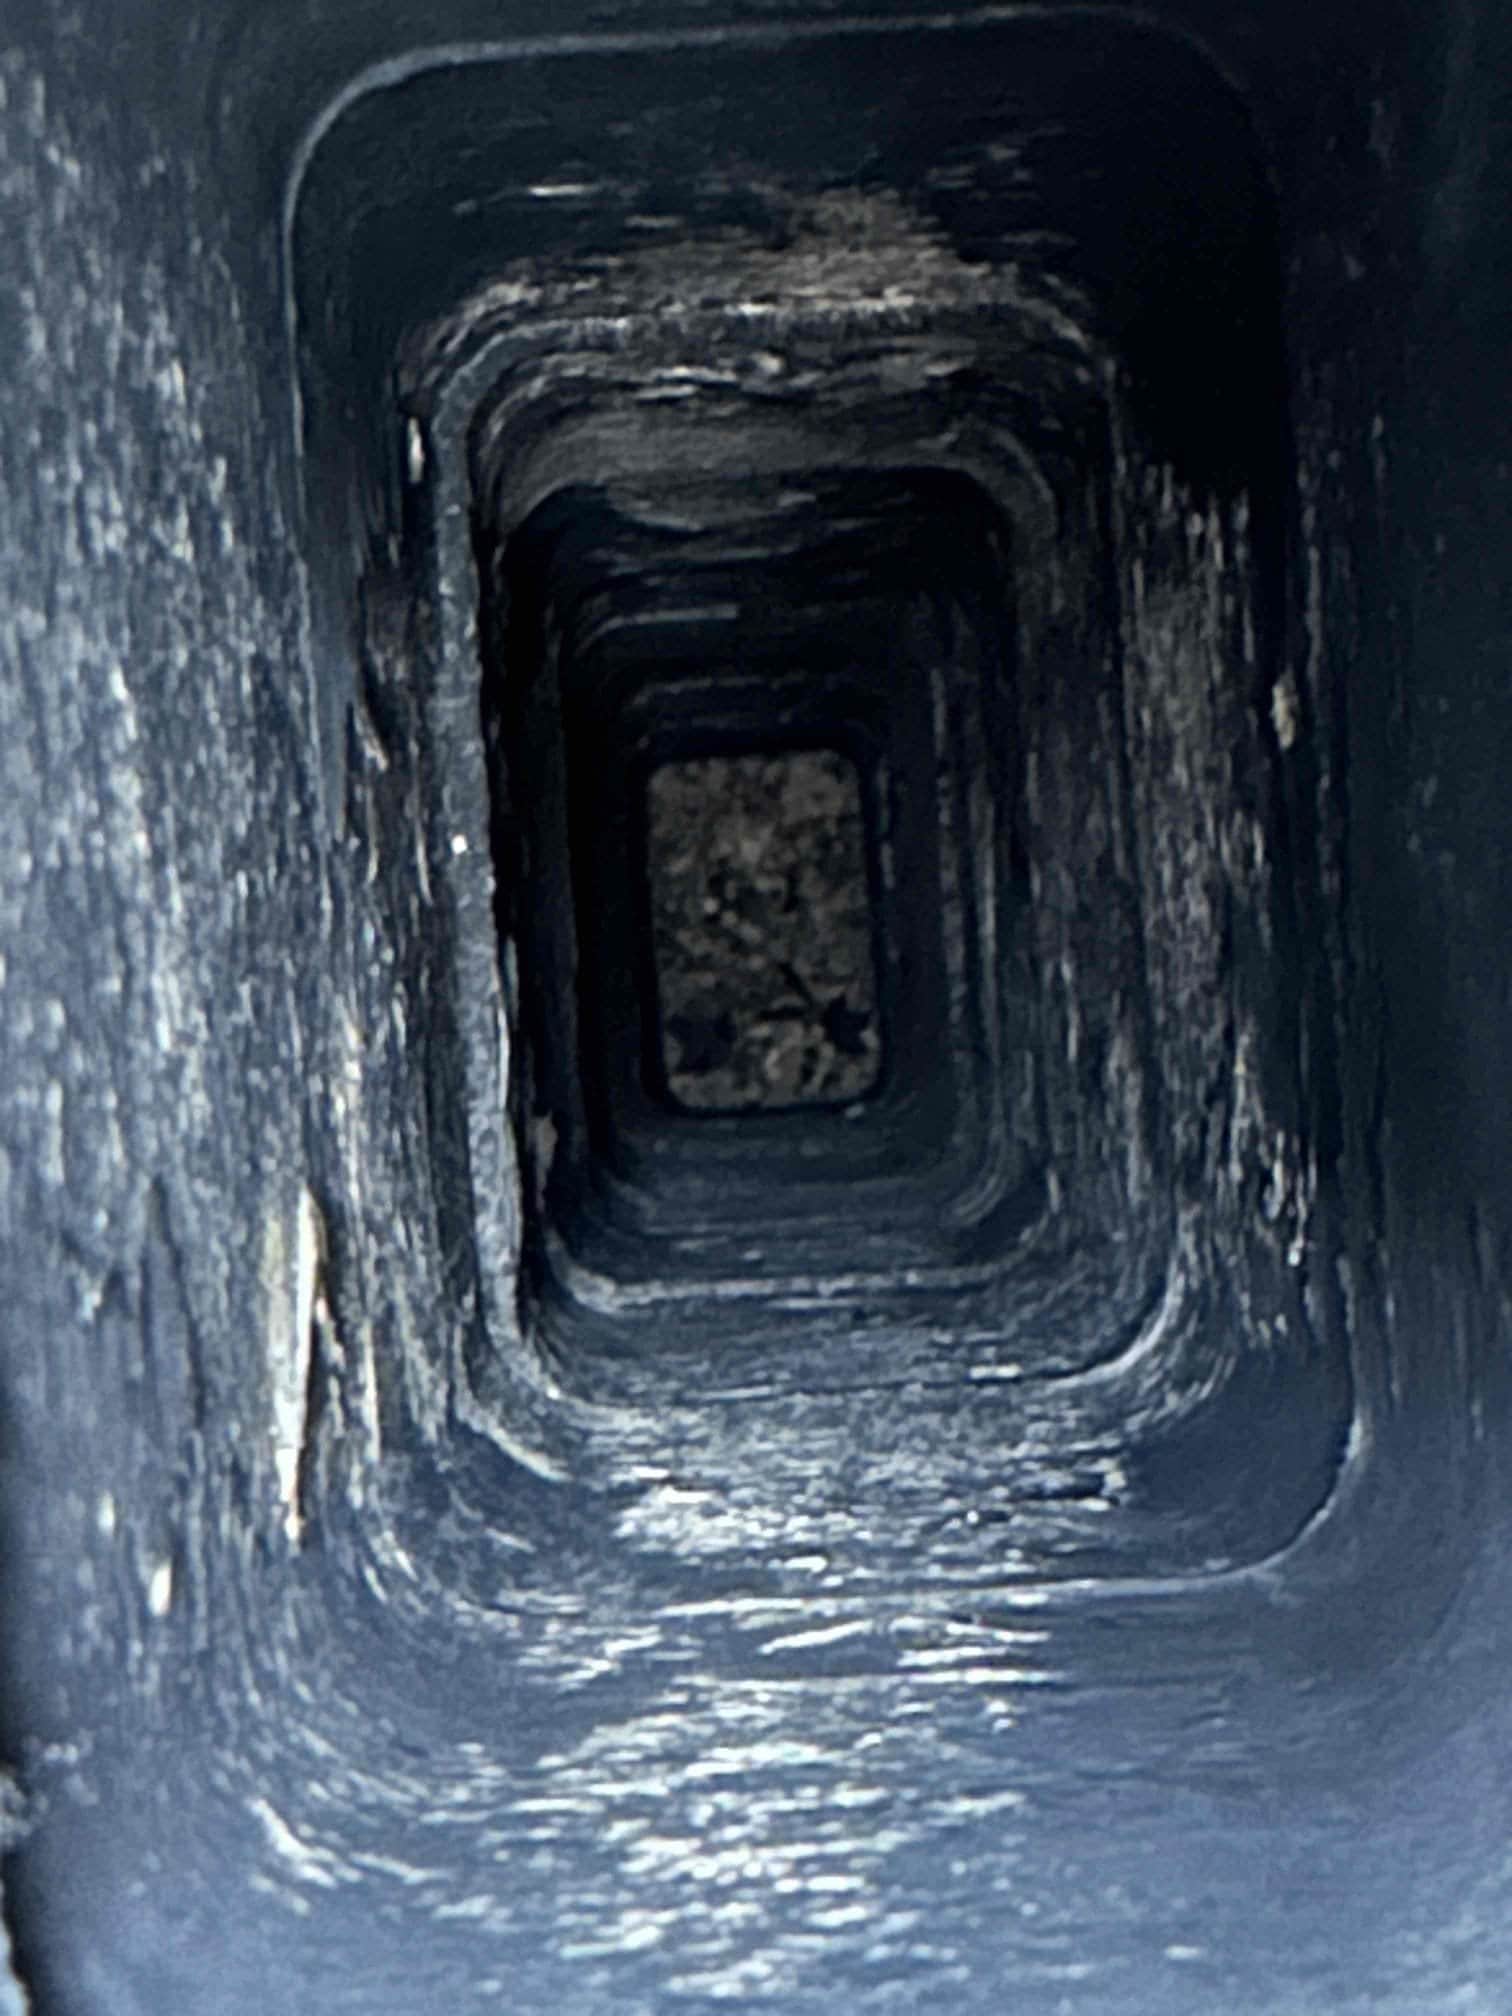
This means getting on your roof, checking the interior chimney structure, and often using specialized cameras to see inside the flue. We’re looking for cracks in the masonry, damaged flashing, deteriorated mortar joints, and signs of water penetration that might not be obvious from a casual look.
The inspection typically takes 1-2 hours for a standard residential chimney. You’ll get a detailed report of what needs immediate attention, what can wait, and realistic cost estimates for each repair.
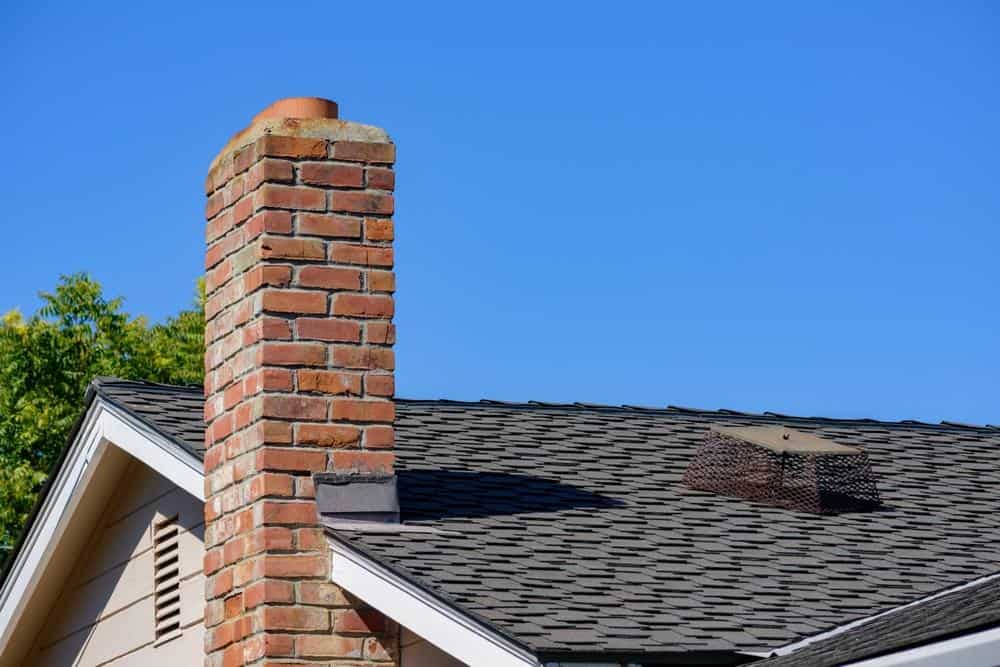
As CSI-certified technicians, we follow a systematic approach when evaluating your chimney’s condition. We start at the top, examining the chimney cap, crown, and flashing for obvious damage or wear patterns.
Moving down, we check every mortar joint in the masonry for cracks or missing sections. These joints are critical because they’re your first line of defense against water penetration. Even small gaps can let moisture in, leading to freeze-thaw damage during Rhode Island winters.
Inside the chimney, we inspect the flue liner for cracks, gaps, or deterioration. A damaged liner is a serious safety issue because it can allow dangerous gases to enter your home or let heat escape into combustible materials around the chimney.
We also check the damper mechanism, smoke chamber, and firebox for structural problems. Water stains on interior walls near the chimney tell us where leaks are occurring and help trace the source of the problem.
Our inspection includes checking your home’s interior for signs of chimney-related issues. Water damage on ceilings or walls, white staining on exterior masonry, or rust on the damper or firebox all provide clues about what repairs are needed.
We document everything with photos and detailed notes. This documentation helps you understand the scope of work needed and provides a baseline for future inspections.
Want live answers?
Connect with a Certified Chimney Inspections expert for fast, friendly support.
Once the inspection is complete, the actual repair timeline depends on what’s wrong and how extensive the damage is. Simple fixes like replacing a chimney cap might take a few hours, while major masonry repair could require several days.
Most chimney repair projects fall into predictable categories with fairly standard timelines. Understanding these helps you plan around the work and set realistic expectations for when your fireplace will be back in service.
Weather, material availability, and the complexity of accessing your particular chimney can all affect these timelines, but we can usually give you accurate estimates based on the inspection findings.
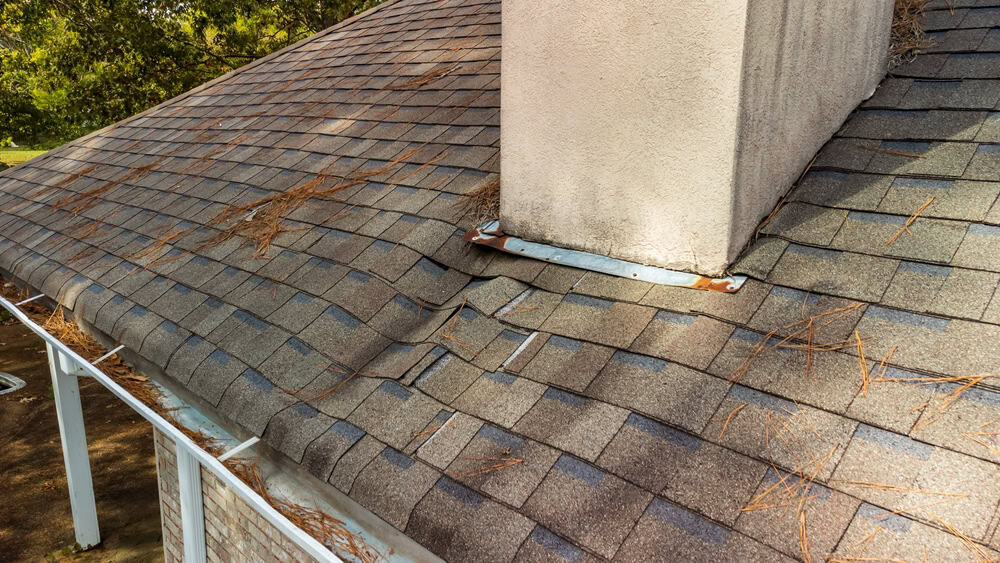
Leaking chimney repair is one of the most common services we provide in Providence County, and the timeline varies significantly based on where the leak is coming from.
Flashing repairs are often the quickest fix when that’s the source of your leak. Damaged flashing around the base of your chimney can usually be replaced or repaired in 4-6 hours. This involves carefully removing old flashing, cleaning the area, and installing new step flashing that’s properly integrated with your roof system.
However, if water has been leaking for a while, there might be additional damage to roof decking or interior structure that extends the timeline. We won’t know the full scope until we remove the old flashing and can see what’s underneath.
Chimney crown repairs take longer because they involve masonry work that needs proper curing time. A cracked or deteriorated crown might require 1-2 days of active work, but the repair compound needs several days to fully cure before the chimney can be used.
More complex leak sources, like damaged flue liners or multiple points of water entry, can extend the timeline to several days or even a week. These repairs often require specialized materials and techniques that take time to implement properly.
The key with leaking chimney repair is addressing all the sources of water penetration, not just the obvious ones. We know that water can travel along unexpected paths inside your chimney system, so we take time to ensure the repair is comprehensive.
Chimney masonry repair is where timelines can vary most dramatically, depending on how much of your chimney structure needs attention.
Repointing mortar joints is the most common masonry repair. For a typical residential chimney, this usually takes 1-2 days of active work. We remove deteriorated mortar, clean the joints, and apply new mortar that matches the original in both strength and appearance.
The curing process is critical for masonry repairs. New mortar needs time to properly set and bond with existing masonry. This means even though the active work might be done in a day or two, your chimney shouldn’t be used for several more days while everything cures.
Partial chimney rebuilds, where sections of damaged masonry are removed and replaced, typically require 3-5 days depending on the extent of the damage. This type of repair is more common in older homes where years of water damage have compromised the structural integrity of the masonry.
Weather plays a bigger role in masonry repair timelines than other chimney services. Mortar work can’t be done in freezing temperatures, during rain, or in extreme heat. Rhode Island’s variable weather sometimes means starting and stopping work based on conditions.
Major masonry repairs often require scaffolding or specialized equipment, which adds time to the project setup and breakdown. However, this equipment allows us to work more safely and efficiently once it’s in place.
The investment in proper masonry repair pays off in longevity. Quality repointing work should last 20-30 years, while rushed or improper repairs might need attention again in just a few years.
Understanding the chimney repair process helps you make better decisions about timing, contractors, and expectations. Most repairs follow a predictable pattern: thorough inspection, detailed estimate, systematic repair work, and proper curing time.
The timeline for your specific project depends on what’s wrong, how extensive the damage is, and weather conditions during the repair period. Simple fixes might be completed in a day, while comprehensive repairs could take a week or more.
Working with experienced, CSI-certified technicians ensures your repairs are done right the first time. When you’re ready to address your chimney problems, we at Certified Chimney Inspections can provide the thorough assessment and professional repair work your home deserves.
Continue learning: